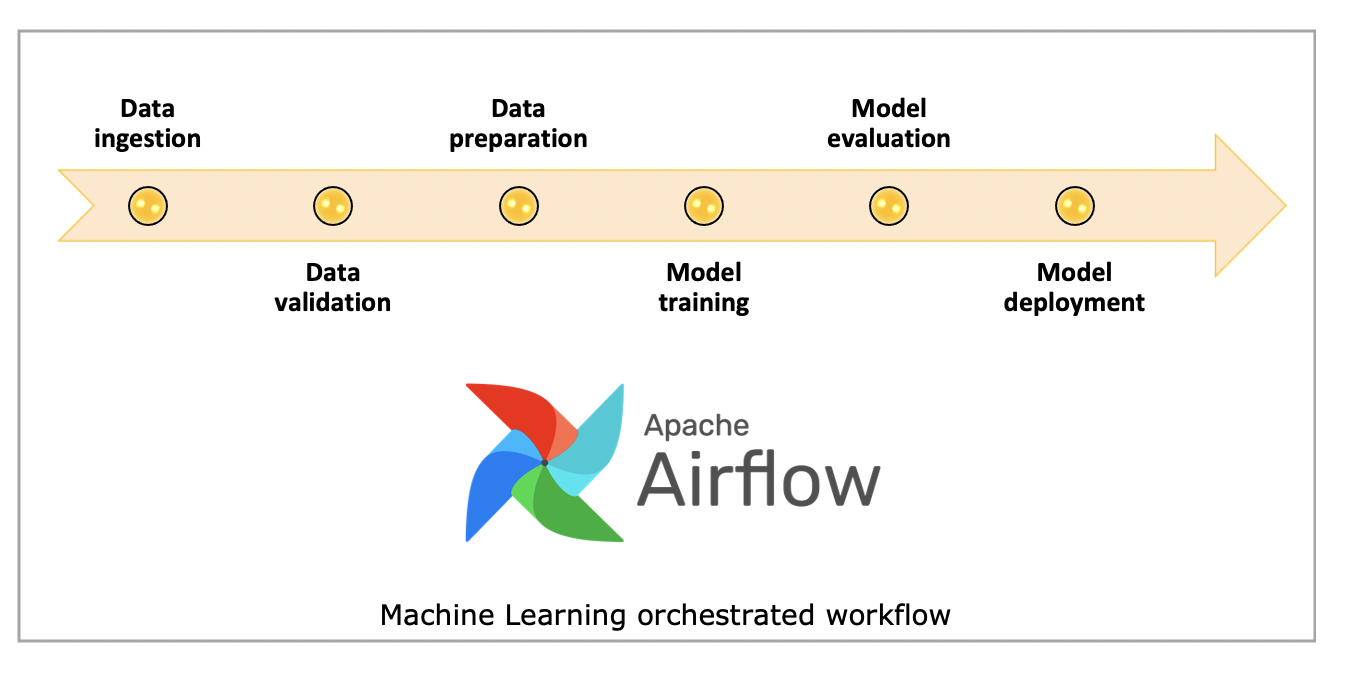
Apache Airflow is an open-source workflow orchestration tool that lets you programmatically author, schedule and monitor data pipelines. A common misunderstanding about Airflow is that it's a compute engine, when in fact it orchestrates different compute engines. This project implements a data preprocessing pipeline for IMDB movie ratings using Apache Airflow, but this is a general structure for tabular data machine learning pipelines. We can call it Extract Transform Load in terms of data engineering. Apache Airflow helps with orchestration of data pipelines whether they contain transform operations or need high scalability.
The pipeline is designed with modular, idempotent tasks but what is idempotent? Determinism in this context - Airflow is not just orchestration, we can also call it automation. It must handle countless re-runs without any problem. For example, if we have daily ingests to our datasets, after one year it must still be working for 365 runs without changing the structure - same inputs should produce the same result without side effects (like duplicate data, overwrites, etc.). Airflow might retry some tasks or fail on some operations, this is the nature of the pipeline - what's important is how it handles these failures while continuing the execution flow.
- Define preprocessing from previous step as Airflow dag (sequence of tasks)
- Each task should be as thin as possible
- Types of tasks that could be included:
- merging with another data source (if can't find it, split existing data in some reasonable manner)
- cleaning (filtering, correct data types)
- split (both train/test and cross-validation). Could be done in several ways, choose one reasonable for your dataset.
- unsupervised transformations (OHE, embeddings)
- Airflow best practices
- Correct split with respect to data
- Clean code / code structure
Before reviewing our project, let's first take a look at core concepts of Apache Airflow, then we will see the ones used in our project. Airflow Documentation – Core Concepts
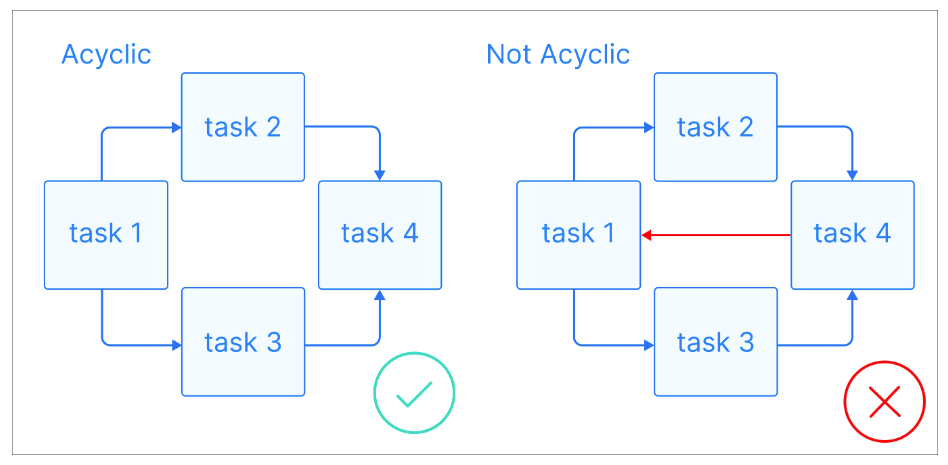
- Directed Acyclic Graph describing workflow
- A DAG (Directed Acyclic Graph) in Airflow is a workflow that defines the order of tasks with no cycles or loops
- "Directed": tasks run in a specific order
- "Acyclic": no task can depend back on itself https://media.datacamp.com/cms/dag_2.png
- Single unit of work, blueprint of works
- Fine‑grained retries, metrics
- What should be done and how - key point of airflow tasks
- While creating the file it can seem like part of the same python function but dag file is just about the blueprint
- All tasks are scheduled by the airflow scheduler and run independently by the airflow executor
- Examples:
extract_ratings,clean_titles, etc.
- Defines type of work - what kind of task is this? Is this python function? Or bash line executing tasks?
- Template class that turns params → task
- Reuse patterns (Python, Bash, SQL)
- Examples: PythonOperator, EmptyOperator, EmailOperator
- They are kind of condition checker for apache airflow
- Wait for this script file or until this file appears on the system
- Operator that waits for a condition (file, time, SQL row…)
- FileSensor waits for CSVs
- Examples: filesensor, pythonsensor, ExternalTaskSensor (Another DAG/task to finish), TimeDeltaSensor (A fixed delay, e.g., 2 hours)
- Logical/UI - it is not about how it handles tasks under the hood, but since we are creating very complex pipelines it helps organize and understand
- We will see this visually in the next parts
- Example:
transform_group
- Refers to Cross‑communication via tasks/run/dags with key value style
- Pass small data between tasks
- This is important - we must not pass files via xcom, it is good for parameters, small configs etc.
- Used to sync file paths from extract → clean → merge
- We said airflow is an orchestrator. Let's say we used python date function- in this scenario how can airflow understand without running this python part and script? Jinja templating helps with this problem - it can detect dynamically without running the python
- Not recommended for highly time sensitive operations
- {{ ds }} logical date as YYYY-MM-DD
- Dynamic filenames, datestamps, SQL, API
- Example: ratings_{{ ds_nodash }}.csv
Airflow Documentation – Executor Types
- We said there are a lot of things to run but how does Airflow handle these works? There are a couple executor backend styles
- Types:
- SequentialExecutor (for development/testing only): Runs tasks sequentially in a single process
- LocalExecutor: Runs tasks in parallel on the same machine as the scheduler. Resource management is still limited by the machine's resources
- CeleryExecutor: Distributes tasks to multiple worker nodes. You can manage resources by configuring the number of worker processes on each node and by using queues to direct tasks to specific workers with appropriate resources
- KubernetesExecutor: Each task runs in its own Kubernetes pod providing excellent resource isolation and management. You can define resource requests and limits (CPU, memory) for the pod, providing fine-grained control over the resources allocated to the task. This is a powerful option for resource-intensive tasks
- Examples:
- KubernetesPodOperator, DockerOperator
- Other Operators: Some cloud-specific operators (e.g., for AWS Batch, Google Cloud Dataflow) often have parameters to configure the underlying compute resources used by the service
- Process that creates DAG runs & queues tasks
- Heartbeat of Airflow
- It schedules operations based on two main topics: time constraints (per day, per week etc.) or specific triggers (when something happens)
- Branches/cleanup paths, handles failures
- Defaults (all_success) for linear flow; could add cleanup tasks
- trigger_rule="one_failed"
- Rule types:
- all_success: Run if all upstream tasks succeeded (default)
- all_failed: Run if all upstream failed
- all_done: Run if all upstream are done (success, fail, skipped...)
- one_success: Run if any one upstream succeeded
- one_failed: Run if any one upstream failed
- none_failed: Run if no upstream failed (success or skipped allowed)
- none_skipped: Run if no upstream was skipped
- always: Run no matter what
- In this project we used classical DAG style for understanding concept but for users who want simplicity, TaskFlow API is enough
- Under the hood they are working the same but classical method is more customizable
- @task decorator syntax
- Use @dag and @task decorators
- Type‑hinted Python, easier tests
- Airflow is used by high tech companies with tight schedules - due to this reason service level agreements are important
- It tracks SLA times, when it's missed it marks and gives alerts depending on your configuration
- Expected durations and notifications
- Detect latency, fire emails
- Email alerts already configured (email_on_failure)
- Our company has a lot of work to do - this is clear, but do they all have same priority? Or do they all need cutting edge resources? Of course not
- Queues take control here - route tasks to the right workers
- For example we have compute pools: high memory, low memory and gpu_pool
- We can define our tasks depending on these pools via queues
- Prevents resource starvation and efficient handling of resources
- Sometimes data sources, structures or requirements can change and Airflow must handle this change with different types of workflows
- Branches help with defining these paths
- While creating data resources/datasets via Airflow, a lot of times it depends on multiple data resources
- Handling each of them independently is hard to follow
- Dataset aliasing helps management
- For example we have dataset A created from dataset B and C - with aliasing we can trigger the dataset A update whenever B or C changed
- Helps with excluding unfinished DAGs, tests or helper functions from our orchestrator

Figure 1: Overview of the Airflow ETL pipeline for IMDB dataset.
PythonOperator
Download ratings TSV → CSV: if it exists with same day stamp it doesn't redownload, just pass path via Xcom communication. Key point while creating this data/time stamps is handling timezones and daylight saving time, especially if we are working with international infrastructure - matching all times via UTC will be good practice, converting only view model. In this way Airflow can handle scheduler without problem across all DAGs.
PythonOperator
Download titles TSV → CSV, same as extract ratings
Block until CSV exists: on this project it seems unnecessary at first look but whenever we are using object storage or working with petabytes of data, creation of files takes time. In this project I added it to simulate how it works.
Now we got datasets but are they okay for sending to the data science team? Of course not and probably never will be :) In the transform part we did some basic cleaning, converting operations, proper join operations for different datasets.
And of course we use logger for proper debugging on Airflow UI. While all of this is happening, remember these are different tasks running in different areas scheduled differently - they can be aware of each other via Xcom communication.
**kwargs  # Receives context from Airflow

ti = kwargs['ti']  # Accesses the TaskInstance object

xcom_pull(key='clean_titles_file', task_ids='transform_group.clean_titles')  # Pulls data from XCom using the specified key and task ID

xcom_push(key='titles_file', value=output_file) # Pushes data to XCom; also logs which task pushed it based on the task ID| Task Name | Operation | Description |
|---|---|---|
| clean_titles | PythonOperator | Filter movies, handle nulls, cast dtypes |
| clean_ratings | PythonOperator | Drop nulls |
| merge_data | PythonOperator | Inner join on tconst |
| create_features | PythonOperator | One-Hot encode genres, dump encoder |
| split_data | PythonOperator | 60-20-20 split → train/val/test |
Start empty operator placeholder for debugging and viewing on the UI starting point. Dependencies help with the requirements of every task, remember like we mentioned directed acyclic graphs - execution order between tasks.
# Define the main DAG dependencies
    start >> [extract_ratings_task, extract_titles_task] # runs in parallel
    extract_ratings_task >> ratings_file_sensor # After extracting ratings, wait for the ratings file to be fully available on disk.
    extract_titles_task >> titles_file_sensor
    [ratings_file_sensor, titles_file_sensor] >> transform_group >> end # # Once both sensors succeed, move to transform_group
In our project, we manually defined directories using constants. This worked for development, but it’s not ideal for production. We used these directories to pass data between tasks and store the final outputs. In a real-world setup, we’d typically rely on object storage like AWS S3 or an S3-compatible service like MinIO instead.
# Constants for data directories
BASE_DIR = os.getcwd()  # Get current working directory
RAW_DATA_DIR = os.path.join(BASE_DIR, "raw_data")
CLEAN_DATA_DIR = os.path.join(BASE_DIR, "clean_data")
MERGED_DATA_DIR = os.path.join(BASE_DIR, "merged_data")
FEATURE_DATA_DIR = os.path.join(BASE_DIR, "feature_data")
SPLIT_DATA_DIR = os.path.join(BASE_DIR, "split_data")Whenever we create a DAG, we need to define default parameters that apply to all tasks within it.:
default_args = {
    'owner': 'airflow', # Label indicating who "owns" not affecting functionality
    'depends_on_past': False, # Even if the DAG runs daily, task task_a on April 4 won’t run unless April 3’s task_a succeeded.
    'start_date': datetime(2025, 4, 4), # 	DAG starts running from this date, but not on this date if we specified daily etc time
    'retries': 1, # If the task fails, it will retry 1 time.
    'retry_delay': timedelta(minutes=2), # Wait 2 minutes before retrying a failed task.
    'email_on_failure': True, # Send an email alert if a task fails.
    'email_on_retry': True, # Send an email alert when a task is retried after failure.
    'email': ['[email protected]'], # The recipient list for failure/retry emails.
}
Email is an important part of monitoring our pipelines. While tools like Prometheus and Grafana offer more advanced options, email alerts are simpler to configure. Setting up email requires configuring an SMTP server. One important note: if you're using Outlook or Gmail for testing, you can't use your regular passwordyou’ll need to generate an app-specific password instead.
Next, we’ll create Python functions for our tasks. I’ll include just one example here, since the rest follow a similar structure. These functions include try-except blocks for error handling, conditional checks, and make use of Airflow’s context by accessing **kwargs, task instances, and loggers.:
def extract_ratings(**kwargs):
    """Extract ratings data from source"""
    logical_date = kwargs["logical_date"]
    date_stamp = get_date_stamp(logical_date)
    output_file = f"{RAW_DATA_DIR}/ratings_{date_stamp}.csv"

    # If file already exists, skip re-downloading
    if check_file_exists(output_file):
        logger.info(f"File {output_file} already exists. Skipping extraction.")
        kwargs['ti'].xcom_push(key='ratings_file', value=output_file)
        return output_file

    try:
        logger.info("Extracting ratings data")
        ratings = pd.read_csv("https://datasets.imdbws.com/title.ratings.tsv.gz", sep="\t", compression="gzip", low_memory=False)
        ratings.to_csv(output_file, index=False)
        logger.info(f"Ratings data saved to {output_file}")
        kwargs['ti'].xcom_push(key='ratings_file', value=output_file)
        return output_file
    except Exception as e:
        logger.error(f"Error extracting ratings data: {e}")
raiseNow that we've defined our Python functions and set the default parameters for Airflow, you might wonderwho actually calls these functions? How do they interact with each other? This is where DAGs come in. It's time to create our DAGor multiple DAGs, depending on the use case.
with DAG(
    dag_id='ML_data_pipeline1', #  Unique name for DAG  shown in the Airflow UI must be unique for scheduler
    default_args=default_args, # If we define additional arguments later, we can inherit these defaults applied to all tasks in the DAG.
    description='ETL pipeline for IMDB dataset', #  Short description of the DAG (shown in UI tooltips).
    schedule_interval=None, # This DAG will only run manually. (No automatic triggering) it is only testing we can @daily etc.
    catchup=False, # Prevents running DAGs for past dates between start_date and today. Only runs the latest execution.
    max_active_runs=1, # Only one DAG run can be in progress at a time. Prevents overlapping runs.
    tags=['ml', 'imdb'], # Labels for filtering/grouping
    concurrency=16, #  Maximum number of tasks from this DAG
    doc_md= # Optional markdown documentation. Appears in the DAG UI "Docs" tab.
    """
    # IMDB Movie Rating Prediction Pipeline

        This DAG performs the following steps:
        1. Extract data from IMDB sources
        2. Clean and preprocess the data
        3. Merge datasets
        4. Create features
        5. One-hot encode categorical variables
        6. Split into train, validation, and test sets
    Owner: Learn Platform Data Team
    Frequency: Daily
    """,
) as dag: # context manager that registers all the tasks inside as part of the dag.Now that we've defined our DAGs, it's time to create the tasks. We'll start with the EmptyOperator, which acts as a simple placeholder and doesn't perform any action
# Start operator
start = EmptyOperator(task_id='start')
Now what about python related ones? PythonOperator combines task_id + which function to call, and this combined is tasks:
# Extract tasks
extract_ratings_task = PythonOperator(
    task_id='extract_ratings',
    python_callable=extract_ratings,
    provide_context=True
)
Now let’s take a look at an example using file sensors.
ratings_file_sensor = FileSensor(
    task_id='ratings_file_sensor', # File path to watch (waits for the specified file to appear)
    filepath=os.path.join(RAW_DATA_DIR, f"ratings_{{{{ ds_nodash }}}}.csv"), # Airflow macro with date stamp
    poke_interval=30, # Check every 30 seconds
    timeout=300,  # Wait up to 300 seconds (5 minutes).  If file doesn't appear → task fails
    mode='poke' #  checks in the same process (useful for short wait times) 'reschedule' for long waits to free up worker slot
)
ow that our files have been extracted and the sensors have detected them on the system, it's time to look at TaskGroup.
with TaskGroup(group_id='transform_group') as transform_group:
    clean_titles_task = PythonOperator(
        task_id='clean_titles',
        python_callable=clean_titles,
        provide_context=True
    )
    ...
    # Define dependencies within the transform group
    [clean_titles_task, clean_ratings_task] >> merge_task >> features_task >> split_task
Now end operator:
end = EmptyOperator(task_id='end')Finally, let's take a look at how we define dependencies across all tasks.
# Define the main DAG dependencies
start >> [extract_ratings_task, extract_titles_task] # runs in parallel # Both extract_ratings_task and extract_titles_task start at the same time, after start.
extract_ratings_task >> ratings_file_sensor # After extracting ratings, wait for the ratings file to be fully available on disk.
extract_titles_task >> titles_file_sensor
[ratings_file_sensor, titles_file_sensor] >> transform_group >> end # Once both sensors succeed, move to transform_groupNow it’s time to run our DAG. First, set up Apache Airflowyou can follow the official guide here. Even though setting the AIRFLOW_HOME folder is technically optional, it’s a good idea to define it explicitly in a specific directory.
Once you start running your DAGs, another important point becomes clear: Airflow is more than just a Python library. Using a virtual environment is strongly recommended to avoid dependency issues.
Before starting Airflow, make sure to clone this repository:
git clone https://github.com/mtech00/MLE-24-25.git
cd MLE-24-25/module-4-pipelines
Copy ml_etl.py and requirements.txt into your Airflow home directory. If you followed the setup guide, this directory is likely located at ~/airflow. Make sure to place the DAG file inside the airflow/dags folder.
Next, install the required libraries for the DAG. Remember, this must be done within the same virtual environment where Airflow is installed:
pip install -r requirements.txt
Now we are ready to start airflow. If you want to follow this guide, run airflow inside airflow home folder. Just as a reminder, if you don't want to see embedded examples from airflow, open airflow.cfg via text editor, find load_examples and change True to False: load_examples = False. Now airflow doesn't load unnecessary demo dags - you will see only our project.
Now time to start our crank:
airflow standalone
After a successful start, you can access the Airflow UI at localhost:8080. It will prompt you for a username and password. You can find the password in the Airflow home directory, in a file named standalone_admin_password.txt.
Now it's time to explore the UI!

Figure 2: Home Page of the Airflow UI
The starting page displays a list of your DAGs, along with options like the manual trigger button, run information, tags, and scheduling details.
One especially useful feature is the reparse button, located between the start and delete buttons. When you update your DAG file, clicking this triggers an automatic re-parsing process.
Airflow also automatically checks for syntax errors when parsing DAG files, helping you catch mistakes early.
airflow dags test <dag_id> <execution_date>
You can also run a specific task instance locally using the CLI, which is helpful for debugging.
Another useful command is for checking DAG import errors. If there are issues while Airflow tries to load your DAGs, you can use this to see detailed error messages:
airflow dags list-import-errors
Now let’s select our DAG, "ML_data_pipeline1".
On the left side, you'll see a matrix of tasks and runs, organized by date and color-coded. You might notice that some blocks appear longer than othersthis is because the visual also represents the duration of each task.
On the right side, you'll find columns that provide general information about the DAG.

Figure 3: Showing the DAG run history and task statuses
On the Task Duration page, you can compare the runtime of different tasks across various dates.

Figure 4: Task duration trends visualized for performance monitoring.
Now let’s switch to the Graph Viewone of the most intuitive and visual ways to understand our project at a high level.
Figure 1: DAG graph view showing task structure
So far, we’ve explored DAG-level informationbut what about individual tasks?
In Graph View, you can click on any task to access its details. Once clicked, you’ll be taken to a new page with options like Logs and XComs.
Here, we're viewing the Logs tab. This is where you can see the output from your task runsespecially useful since we used the logger in our Python functions.

Figure 5: Logs of a specific task instance with runtime and exception details.
Another important section is XCom. On this page, you can view the key-value pairs that tasks have pushed to XCom during execution.

Figure 6: Displays the XCom page in Airflow, showing key-value data exchanged between tasks during DAG execution.
Lastly, the Cluster Information page provides both visual and numerical details about the state of your Airflow cluster.

Figure 7: Airflow's cluster activity page, detailing active DAGs, running tasks, and worker statuses across the environment
If everything runs smoothly, we should see a structure like this:
project/
├── airflow-webserver.pid
├── airflow.cfg
├── airflow.db
├── clean_data/
│   ├── ratings_clean_20250421.csv
│   └── titles_clean_20250421.csv
├── dags/
│   └── ml_elt.py
├── feature_data/
│   ├── encoder_20250421.joblib
│   └── features_20250421.csv
├── logs/
├── merged_data/
│   └── merged_data_20250421.csv
├── raw_data/
│   ├── ratings_20250421.csv
│   └── titles_20250421.csv
├── split_data/
│   ├── X_test_20250421.csv
│   ├── X_train_20250421.csv
│   ├── X_val_20250421.csv
│   ├── y_test_20250421.csv
│   ├── y_train_20250421.csv
│   └── y_val_20250421.csv
├── standalone_admin_password.txt
└── webserver_config.py
- TaskFlow API for cleaner DAGs
- Unit tests for transformation steps
- Data validation tasks
- Use Docker for reproducible environments
- Performance Monitoring
-
Apache Airflow Official Documentation
Core concepts and detailed guides for all Airflow features used in this project.
https://airflow.apache.org/docs/apache-airflow/stable/core-concepts/index.html -
Medium Article - Orchestrating Machine Learning Experiments with Apache Airflow
Original inspiration and visual guide for ML pipeline design with Airflow.
https://medium.com/analytics-vidhya/orchestrating-machine-learning-experiments-for-mlops-using-apache-airflow-dcbc0bab3801 -
Airflow Executors Guide
Overview of executor types for managing task execution across environments.
https://airflow.apache.org/docs/apache-airflow/stable/core-concepts/executor/index.html#executor-types -
IMDB Datasets
Source of raw datasets used in the pipeline (ratings and titles).
https://datasets.imdbws.com/