
Cachet is a cache / proxy for profile pictures and emojis on the hackclub slack! I made it because calling the slack api every time you want a profile image or emoji is expensive and annoying. Now you can just call the cachet api and get a link to the image or emoji you want! Best of all we are just linking to slack's cdn so it doesn't cost me much of anything (besides db space) to run!
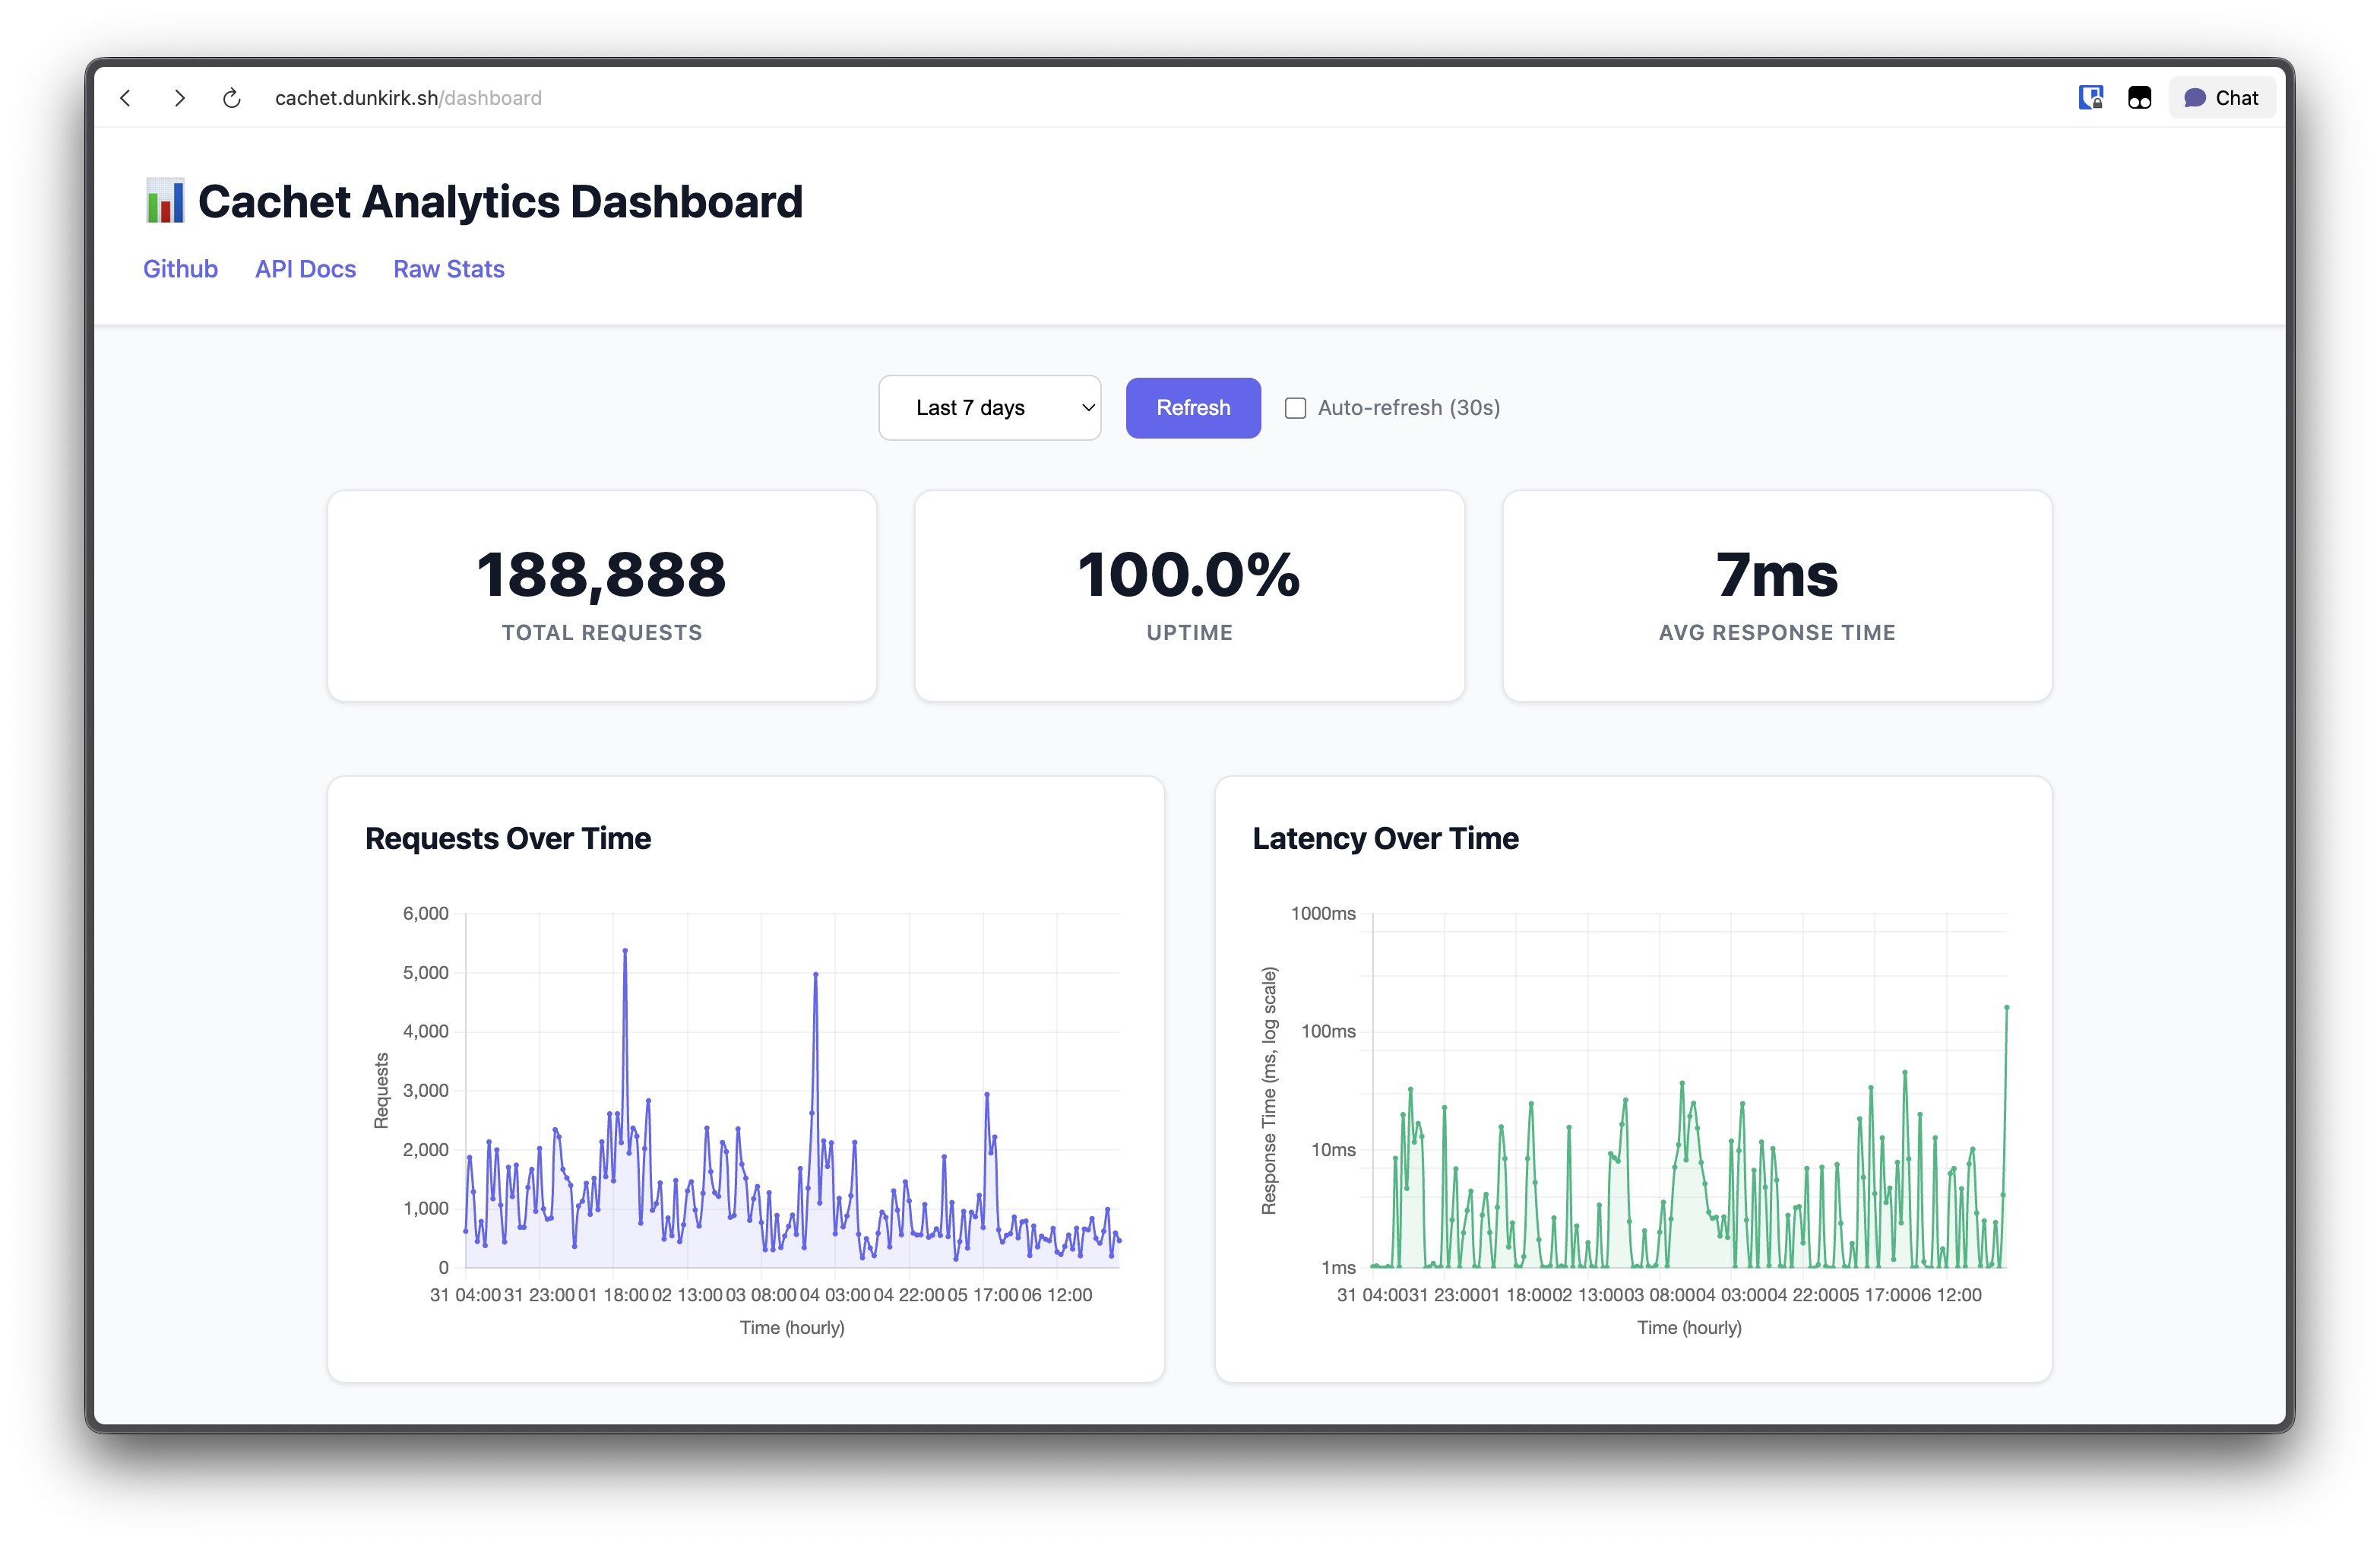
I also built an analytics dashboard that shows request patterns over time and latency graphs with logarithmic scaling (because some requests hit 1000ms+ and that was making the normal latency invisible). The dashboard loads progressively to avoid the analytics queries blocking the UI.
Well first the question is how do I host it lol.
I'm hosting on nest so I just setup a systemd service file that runs bun run index.ts in the root dir of this repo. Then I setup caddy to reverse proxy cachet.dunkirk.sh to the app.
Your .env file should look like this:
SLACK_TOKEN=xoxb-123456789012-123456789012-123456789012-123456789012
SLACK_SIGNING_SECRET=12345678901234567890123456789012
NODE_ENV=production
SENTRY_DSN="https://[email protected]/123456" # Optional
DATABASE_PATH=/path/to/db.sqlite # Optional
PORT=3000 # Optional
The slack app can be created from the manifest.yaml in this repo. It just needs the emoji:read and users:read scopes.
I included a service file in this repo that you can use to run the app. Just copy it to ~/.config/systemd/ and then run systemctl --user enable cachet and systemctl --user start cachet to start the app.
cp cachet.service ~/.config/systemd/user/
mkdir data
systemctl --user enable cachet
systemctl --user start cachet
Now grab a free port from nest (nest get_port) and then link your domain to your nest user (nest caddy add cachet.dunkirk.sh) (don't for get to make a CNAME on the domain pointing to kierank.hackclub.app) and then after editing in a Caddyfile entry like the following you should be good to go! (Don't forget to restart caddy: systemctl restart --user caddy)
http://cachet.dunkirk.sh {
        bind unix/.cachet.dunkirk.sh.webserver.sock|777
        reverse_proxy :38453
}The api is pretty simple. You can get a profile picture by calling GET /profile/:id where :id is the slack user id. You can get an emoji by calling GET /emoji/:name where :name is the name of the emoji. You can also get a list of all emojis by calling GET /emojis.
Additionally, you can manually purge a specific user's cache with POST /users/:user/purge (requires authentication with a bearer token).
The analytics dashboard at / shows request counts and latency over time with configurable time ranges. I split the analytics into separate API endpoints (/api/stats/essential, /api/stats/charts, /api/stats/useragents) so the basic stats load immediately while the heavy chart queries run in the background.
There are also complete swagger docs available at /swagger with detailed endpoint specifications and examples for all API routes.

The app is honestly super simple. It's pretty much just a cache layer on top of the slack api. When you request a profile picture or emoji it first checks the cache. If the image is in the cache it returns the link to the image. If the image is not in the cache it calls the slack api to get the link to image and then stores that in the cache before returning the image link to you!
I had some performance issues where the latency would spike to 1000ms+ every few hours because of how I was handling cache expiration. Users would get purged daily and emojis would expire randomly causing bulk API fetches during peak traffic. I fixed this by switching to a "touch-to-refresh" pattern where active users get their TTL extended when accessed but queued for background updates. Now emoji updates happen at 3 AM and user cache cleanup is probabilistic during off-peak hours.
There were a few interesting hurdles that made this a bit more confusing though. The first was that slack returns the emoji.list endpoint with not just regular emojis but also aliased emojis. The aliased emojis doesn't seem that hard at first untill you realize that someone could alias stock slack emojis. That means that we don't have a url to the image and to make it worse slack doesn't have an offically documented way to get the full list of stock emojis. Thankfully an amazing user (@impressiver) put this all into a handy gist for everyone to use! It was last updated on 2020-12-22 so it's a bit out of date but slack doesn't seem to be changing their emojis too often so it should be fine for now.
Note
Turns out that to get the update emoji data all you need to do is open the react dev tools to the component tab and copy the consolidatedEmojis field. Just make sure this is done in a brand new workspace so there are no existing emojis that get lumped in.
{
    "ok": true,
    "emoji": {
        "hackhaj": "https://emoji.slack-edge.com/T0266FRGM/hackshark/0bf4771247471a48.png",
        "hackhaj": "alias:hackshark"
        "face-grinning": "alias:grinning"
    }
}

{
  "grinning": "https://a.slack-edge.com/production-standard-emoji-assets/14.0/google-medium/1f601.png"
}
The second challenge (technically its not a challenge; more of a side project) was building a custom cache solution based on Bun:sqlite. It ended up being far easier than I thought it was going to be and I'm quite happy with how it turned out! It's fully typed which makes it awesome to use and blazing fast due to the native Bun implementation of sqlite. Using it is also dead simple. Just create a new instance of the cache with a db path, a ttl, and a fetch function for the emojis and you're good to go! Inserting and getting data is also super simple and the cache is fully typed!
I also added analytics tracking that stores every request with timestamps, response times, endpoints, and user agents. The database was getting pretty big (1.26M records) so I had to optimize the analytics queries and add data retention (30 days). The analytics dashboard splits the queries into separate endpoints so you get the basic stats immediately while the chart data loads in the background.
const cache = new SlackCache(
  process.env.DATABASE_PATH ?? "./data/cachet.db",
  24,
  async () => {
    console.log("Scheduled emoji refresh starting");
  },
);

// Set up background processing for user updates
cache.setSlackWrapper(slackWrapper);

await cache.insertUser(
  "U062UG485EE",
  "Kieran Klukas",
  "he/him",
  "https://avatars.slack-edge.com/2024-11-30/8105375749571_53898493372773a01a1f_original.jpg"
);

await cache.insertEmoji(
  "hackshark",
  null,
  "https://emoji.slack-edge.com/T0266FRGM/hackshark/0bf4771247471a48.png"
);

const emoji = await cache.getEmoji("hackshark");
const user = await cache.getUser("U062UG485EE"); // Automatically extends TTL and queues background refresh if stale

// Manual cache management
const purgeResult = await cache.purgeUserCache("U062UG485EE");
const healthStatus = await cache.healthCheck();

// Analytics data access
const stats = await cache.getEssentialStats(7);
const chartData = await cache.getChartData(7);
const userAgents = await cache.getUserAgents(7);
The final bit was at this point a bit of a ridiculous one. I didn't like how heavyweight the bolt or slack-edge packages were so I rolled my own slack api wrapper. It's again fully typed and designed to be as lightweight as possible. The background user update queue processes up to 3 users every 30 seconds to respect Slack's rate limits.
const slack = new Slack(
  process.env.SLACK_TOKEN,
  process.env.SLACK_SIGNING_SECRET,
);

const user = await slack.getUser("U062UG485EE");
const emojis = await slack.getEmoji();

// Manually purge a specific user's cache using the API endpoint
const response = await fetch(
  "https://cachet.example.com/users/U062UG485EE/purge",
  {
    method: "POST",
    headers: {
      Authorization: `Bearer ${process.env.BEARER_TOKEN}`,
    },
  },
);
const result = await response.json();
// { message: "User cache purged", userId: "U062UG485EE", success: true }The app includes a migration system to handle database schema and data changes between versions. Migrations are automatically run when the app starts.
Previous versions are tracked in a migrations table in the database, which records each applied migration with its version number and timestamp.
To create a new migration:
// src/migrations/myNewMigration.ts
import { Database } from "bun:sqlite";
import { Migration } from "./types";

export const myNewMigration: Migration = {
  version: "0.3.2", // Should match package.json version
  description: "What this migration does",

  async up(db: Database): Promise<void> {
    // Migration code here
    db.run(`ALTER TABLE my_table ADD COLUMN new_column TEXT`);
  }
};

// Then add to src/migrations/index.ts
import { myNewMigration } from "./myNewMigration";

export const migrations = [
  endpointGroupingMigration,
  myNewMigration,
  // Add new migrations here
];

// IMPORTANT: Also add to src/cache.ts runMigrations method
private async runMigrations() {
  try {
    const migrations = [
      endpointGroupingMigration,
      myNewMigration  // Add here too to avoid circular dependencies
    ];
    // ...
  }
}
Remember to update the version in package.json when adding new migrations.
Note: Migrations must be defined in both index.ts and cache.ts to avoid circular dependencies in the import structure.
The app uses a type-safe route system that automatically generates Swagger documentation from route definitions. This ensures the API docs always stay in sync with the actual implementation.
To add a new route, you need to:
- Create the handler function in
src/handlers/index.ts:
export const handleMyNewEndpoint: RouteHandlerWithAnalytics = async (
  request,
  recordAnalytics,
) => {
  // Your handler logic here
  const data = { message: "Hello from new endpoint" };

  await recordAnalytics(200);
  return Response.json(data);
};- Add the route definition in
src/routes/api-routes.ts:
"/my-new-endpoint": {
  GET: createRoute(
    withAnalytics("/my-new-endpoint", "GET", handlers.handleMyNewEndpoint),
    {
      summary: "My new endpoint",
      description: "Does something useful",
      tags: ["MyFeature"],
      parameters: {
        query: [
          queryParam("limit", "number", "Number of items to return", false, 10)
        ]
      },
      responses: Object.fromEntries([
        apiResponse(200, "Success", {
          type: "object",
          properties: {
            message: { type: "string", example: "Hello from new endpoint" }
          }
        })
      ])
    }
  )
}
The route will automatically:
- Handle analytics recording (request timing, status codes, user agents)
- Generate Swagger documentation with the provided metadata
- Include proper TypeScript types for parameters and responses
- Validate the route definition at compile time
No need to manually update Swagger docs or add boilerplate analytics code. The system handles all of that automatically based on your route definitions.

© 2024-present Kieran Klukas
